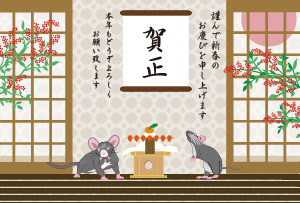
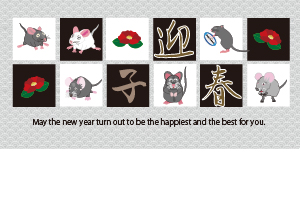
ネズミのイラスト年賀状素材 子年
Page: | 最初 | 1 | 2 | 3 | 4 | 5 ... | 最後 |

Re: ネズミのイラスト年賀状素材 子年 ( No.60 )
A heartwarming creation that embodies the spirit of renewal and fortune. An expert in troubleshooting Canon B203 errors, providing quick fixes, maintenance tips, and printer optimization for seamless performance. If you're interested, my newest blog post is ready for you to read. Understanding and Fixing the Canon B203 Error
Printers have become an essential part of both home and office setups, enabling users to print documents, images, and other materials with ease. However, like all electronic devices, printers can sometimes encounter errors that disrupt their operation. One such issue that Canon printer users may face is the Canon B203 Error. This error can be frustrating, especially when you need to print urgent documents. In this article, we will discuss what causes the Canon B203 Error, how to fix it, and preventive measures to avoid encountering it in the future.
What is the Canon B203 Error?
The Canon B203 Error is a common printer issue that typically occurs in various Canon models, including inkjet and all-in-one printers. This error generally indicates a problem with the printer's hardware or software, which could stem from printhead malfunctions, connectivity issues, or outdated drivers.
Common Causes of Canon B203 Error
Several factors can trigger the Canon B203 Error in your printer. Below are some of the most common causes:
Clogged or Faulty Printhead – The printhead is responsible for transferring ink onto the paper. If it becomes clogged or defective, it can lead to the Canon B203 Error.
Outdated or Corrupt Drivers – Using outdated or incompatible drivers can interfere with the printer's functionality.
Low or Empty Ink Cartridges – When ink levels are low, the printer may fail to complete printing tasks, resulting in errors.
Paper Jams or Obstructions – Foreign objects or paper jams inside the printer can trigger the Canon B203 Error.
Firmware Issues – Sometimes, an outdated firmware version can lead to operational errors.
Hardware Malfunction – Internal printer components may develop faults due to prolonged use or poor maintenance.
How to Fix the Canon B203 Error
If you encounter the Canon B203 Error, don’t panic. Below are several troubleshooting methods that can help you resolve the issue:
1. Restart the Printer
One of the simplest solutions is to turn off your printer and unplug it from the power source. Wait for about 5-10 minutes before plugging it back in and turning it on. This helps reset the printer’s system and may clear the error.
2. Check and Clean the Printhead
A dirty or clogged printhead is a common cause of the Canon B203 Error. Follow these steps to clean it:
Open the printer cover and remove the ink cartridges.
Take out the printhead carefully.
Use a soft, lint-free cloth and warm water to gently clean the printhead.
Allow it to dry before reinserting it into the printer.
3. Update or Reinstall Printer Drivers
Faulty or outdated drivers can cause communication issues between your printer and computer. To update or reinstall your drivers:
Go to the official Canon website.
Download the latest driver compatible with your printer model.
Install the driver and restart your computer and printer.
4. Check Ink Levels and Replace Cartridges
Ensure that your ink cartridges are not empty. If the ink levels are low, replace them with genuine Canon cartridges to avoid further errors.
5. Inspect for Paper Jams
Paper jams can cause operational issues, including the Canon B203 Error. Open the printer, check for stuck paper, and carefully remove it without damaging internal components.
6. Perform a Printer Reset
If the error persists, a hard reset may be necessary:
Turn off the printer and unplug it.
Hold the power button for 30 seconds.
Plug the printer back in and restart it.
7. Update Printer Firmware
Updating your printer’s firmware can resolve software-related issues. Visit the Canon support website to download and install the latest firmware update for your printer model.
Preventing the Canon B203 Error
To minimize the risk of encountering the Canon B203 Error in the future, follow these preventive measures:
Use Genuine Canon Ink Cartridges – Third-party cartridges may cause compatibility issues and damage the printhead.
Perform Regular Maintenance – Clean the printhead and check for dust or debris inside the printer regularly.
Keep Drivers and Firmware Updated – Ensure your printer’s software is always up to date.
Avoid Paper Overloading – Overloading the paper tray can lead to paper jams and operational errors.
Turn Off the Printer Properly – Always use the power button to shut down your printer rather than unplugging it suddenly.
Conclusion
The Canon B203 Error can be frustrating, but with proper troubleshooting and maintenance, you can resolve it effectively. By understanding its causes and applying the solutions provided, you can restore your printer’s functionality and avoid future occurrences. If the problem persists despite troubleshooting, contacting Canon customer support for professional assistance may be necessary. Keeping your printer in good condition with regular maintenance will help you avoid common errors and ensure smooth printing operations.
Re: ネズミのイラスト年賀状素材 子年 ( No.59 )
Thoughtful composition and vibrant strokes make this illustration a standout! Expert in troubleshooting HP OfficeJet Pro 6978 printing issues, specializing in connectivity, driver updates, and hardware diagnostics for seamless printing. A fresh blog post is live, and I’d love your thoughts on it. HP OfficeJet Pro 6978 Not Printing: Causes and Solutions
The HP OfficeJet Pro 6978 not printing issue can be frustrating, especially when you rely on it for daily tasks. This all-in-one printer is known for its efficiency, but like any device, it can encounter problems. If your HP OfficeJet Pro 6978 is not printing, there could be various reasons behind it. This article will guide you through the possible causes and solutions to get your printer working again.
Common Causes of HP OfficeJet Pro 6978 Not Printing
Before troubleshooting, it's important to understand why your HP OfficeJet Pro 6978 is not printing. Here are some common causes:
Connectivity Issues – A faulty USB connection or unstable Wi-Fi network can prevent printing.
Driver Problems – Outdated or corrupted printer drivers can disrupt the printing process.
Paper Jams – Paper stuck in the printer can halt operations.
Low Ink or Toner – The printer may not print if ink levels are too low.
Print Queue Errors – Pending or stuck print jobs can block new print tasks.
Hardware Malfunctions – Internal issues like faulty printheads can cause printing failures.
How to Fix HP OfficeJet Pro 6978 Not Printing
1. Check Connectivity
If your HP OfficeJet Pro 6978 is not printing, first check the connectivity:
For USB Connection: Ensure the cable is securely connected.
For Wi-Fi Connection: Restart your router and reconnect the printer to the network.
For Ethernet Connection: Ensure the cable is properly plugged in and working.
2. Restart the Printer
A simple restart can resolve many issues. Turn off the printer, unplug it for 60 seconds, and restart it. This helps clear minor glitches that may cause the HP OfficeJet Pro 6978 not printing problem.
3. Update or Reinstall Printer Drivers
Outdated or corrupted drivers can cause the HP OfficeJet Pro 6978 not printing issue. To fix this:
Open Device Manager on your PC.
Locate Printers and select HP OfficeJet Pro 6978.
Right-click and choose Update driver.
If updating doesn’t work, uninstall the driver and reinstall it from HP’s official website.
4. Clear Print Queue
A clogged print queue can prevent new print jobs from executing. To clear it:
Open Control Panel > Devices and Printers.
Right-click on HP OfficeJet Pro 6978 and select See what’s printing.
Cancel all pending print jobs.
Restart the printer and try printing again.
5. Check Ink Levels
Low ink levels can cause printing issues. Check the ink cartridges:
On the printer’s control panel, go to Ink Levels.
If ink is low, replace the cartridge with a genuine HP ink cartridge.
Run a Print Head Cleaning from the printer settings to clear any clogged nozzles.
6. Resolve Paper Jams
A paper jam can cause the HP OfficeJet Pro 6978 not printing error. Follow these steps:
Turn off the printer and open the paper tray.
Gently remove any stuck paper.
Check for small paper fragments left inside.
Restart the printer and try printing.
7. Set HP OfficeJet Pro 6978 as Default Printer
If your printer is not set as the default, print jobs may not go through:
Open Control Panel > Devices and Printers.
Right-click on HP OfficeJet Pro 6978 and select Set as Default Printer.
Restart your computer and try printing.
8. Run HP Print and Scan Doctor
HP provides a troubleshooting tool called HP Print and Scan Doctor. Download and run this tool to diagnose and fix common printer issues, including the HP OfficeJet Pro 6978 not printing problem.
9. Reset the Printer
A factory reset can resolve persistent issues:
Go to Settings on the printer’s control panel.
Select Restore Defaults.
Confirm the reset and restart the printer.
10. Contact HP Support
If none of the above solutions work, your HP OfficeJet Pro 6978 not printing issue may require professional assistance. Contact HP Support for further troubleshooting or possible repair.
Conclusion
The HP OfficeJet Pro 6978 not printing problem can be due to various reasons, including connectivity issues, driver problems, low ink levels, and paper jams. By following the troubleshooting steps outlined in this article, you can likely resolve the issue and get your printer working again. Regular maintenance, such as updating drivers and checking ink levels, can help prevent future printing problems. If all else fails, reaching out to HP Support is always an option.
Re: ネズミのイラスト年賀状素材 子年 ( No.58 )
The expressive design conveys warmth and prosperity—an exquisite representation of the Year of the Rat. A dedicated professional with strong communication skills, yet unavailable via email. Prefers direct contact for efficient collaboration and responsiveness. I’ve written something new—take a look at my latest blog. Why You Cannot Receive Emails and How to Fix It
Emails are an essential part of communication, whether for personal or business purposes. However, encountering a situation where you cannot receive emails can be frustrating and disruptive. There are various reasons why this might happen, ranging from technical issues to misconfigurations in your email settings. This article explores the common causes of this issue and provides practical solutions to resolve it.
Common Reasons Why You Cannot Receive Emails
1. Internet Connection Issues
Before jumping to complex solutions, check your internet connection. If your internet is down or unstable, your email client might not be able to fetch new messages. Try opening a website to see if your connection is working properly.
2. Incorrect Email Settings
One of the primary reasons why you cannot receive emails is incorrect email settings. If you have recently changed your email provider, updated your device, or switched to a different network, your email settings might not be configured correctly. Ensure that your IMAP, POP3, and SMTP settings are accurate.
3. Email Server Issues
Sometimes, the issue is on the email provider's end. Email servers may experience downtime due to maintenance or unexpected outages. Check your email provider's status page or contact their support team to see if they are experiencing technical difficulties.
4. Full Mailbox
If your mailbox is full, new messages will not be delivered. This is a common problem, especially for users with limited storage space. To resolve this, delete unnecessary emails or move them to an external storage service like Google Drive or OneDrive.
5. Spam or Junk Mail Filters
Email filters are designed to prevent spam, but they can sometimes mistakenly mark legitimate emails as junk. Check your spam or junk mail folder to see if your missing emails have been filtered incorrectly. You can also adjust your spam settings to prevent this from happening in the future.
6. Blocked Sender or Blacklisted Domains
If you have accidentally blocked a sender or if their domain is blacklisted, you cannot receive emails from them. Check your blocked senders list and remove any important contacts if necessary. You may also need to whitelist specific email addresses to ensure they reach your inbox.
7. Antivirus or Firewall Restrictions
Certain security software and firewalls can interfere with email reception. If your antivirus or firewall settings are too strict, they might be blocking incoming emails. Try temporarily disabling them or adding your email client to the list of trusted applications.
8. Wrong Email Address or Alias
Ensure that the sender is using the correct email address. If you recently changed your email address or set up an alias, incoming messages might be directed to the wrong inbox.
9. Email Forwarding Issues
If you have set up email forwarding, your emails might be redirected to another account without your knowledge. Check your email settings to see if forwarding is enabled and adjust it if necessary.
10. Outdated Email Client or App
Using an outdated email client can cause compatibility issues that prevent you from receiving emails. Update your email client or try accessing your email from a different device or web browser to see if the problem persists.
How to Fix the Issue When You Cannot Receive Emails
1. Restart Your Device and Email Client
Sometimes, a simple restart can resolve temporary issues. Close your email app, restart your device, and reopen your email client to check if the problem is fixed.
2. Verify Email Server Settings
Go to your email settings and ensure that the incoming and outgoing mail server details are correct. If you are unsure, visit your email provider's website for the correct configuration settings.
3. Clear Email Storage
If your mailbox is full, delete old emails, clear the trash folder, and free up space. You can also archive important emails to prevent data loss.
4. Check Spam and Junk Folders
If you suspect that legitimate emails are being marked as spam, check your spam folder. Mark them as "Not Spam" to ensure future emails from the sender go to your inbox.
5. Disable Security Software Temporarily
If you suspect that an antivirus or firewall is blocking your emails, try disabling them temporarily and check if the emails come through.
6. Contact Your Email Provider
If none of the above solutions work, reach out to your email provider's support team. They can check if there are any issues on their end that are preventing you from receiving emails.
Conclusion
Not being able to receive emails can be frustrating, but most issues can be fixed by checking settings, updating software, and ensuring that your email provider is functioning correctly. If you find yourself in a situation where you cannot receive emails, follow the troubleshooting steps outlined above to restore your email functionality. Keeping your email system well-maintained will ensure smooth communication and prevent future email delivery problems.
Re: ネズミのイラスト年賀状素材 子年 ( No.57 )
A wonderful fusion of tradition and artistry, making it a delightful festive card. Expert in HP printer support, troubleshooting errors, setup, driver installation, and maintenance for seamless printing solutions and technical assistance. My latest blog is up, and I'd love for you to read it. HP Printers Support: Your Ultimate Guide to Hassle-Free Printing
In today’s fast-paced world, printers play a vital role in ensuring smooth operations, whether at home or in the office. HP printers, known for their reliability and efficiency, are widely used across the globe. However, like any other technology, they can occasionally face issues that require troubleshooting. This is where HP printers support becomes crucial, providing users with expert assistance to resolve technical problems quickly.
Why Choose HP Printers?
HP has established itself as a leading brand in the printing industry, offering a range of printers tailored to meet various needs. Whether you require an inkjet printer for home use, a laser printer for office work, or an all-in-one printer with scanning and copying functions, HP has a model to suit your requirements. The brand's commitment to quality and innovation makes it a top choice among consumers.
Common Issues Faced by HP Printer Users
Despite their advanced features, HP printers are not immune to technical glitches. Here are some common problems that users encounter:
Printer Not Responding: This can be due to connectivity issues, outdated drivers, or hardware malfunctions.
Paper Jams: Improper paper alignment or dust accumulation can cause paper jams.
Poor Print Quality: Low ink levels, clogged printheads, or incorrect settings may affect print quality.
Slow Printing Speed: High-resolution printing or outdated firmware can slow down the printing process.
Wireless Connectivity Issues: Many users struggle with setting up their HP printers over Wi-Fi or Bluetooth.
How HP Printers Support Can Help
HP provides extensive HP printers support to assist users in resolving technical issues efficiently. The support services include:
1. Online Support and Troubleshooting
HP offers a dedicated online support page where users can find troubleshooting guides, FAQs, and driver downloads. The official HP website provides step-by-step solutions to common printer issues.
2. HP Smart App
The HP Smart App allows users to manage their printers remotely, check ink levels, and troubleshoot minor problems. This app is a valuable tool for quick fixes without requiring expert assistance.
3. Customer Service Helpline
HP’s customer support team is available via phone or live chat to assist users with more complex issues. Professional technicians guide users through troubleshooting steps or schedule repairs if necessary.
4. Remote Assistance
In cases where an issue requires more in-depth troubleshooting, HP offers remote assistance. Technicians can access the printer remotely and diagnose problems without requiring an in-person visit.
5. Warranty and Repair Services
For printers still under warranty, HP provides repair and replacement services at no extra cost. Even out-of-warranty printers can be serviced at affordable rates.
Tips for Maintaining Your HP Printer
To avoid frequent issues and ensure the longevity of your printer, consider the following maintenance tips:
Regular Cleaning: Dust and debris can cause paper jams and affect print quality. Clean the printer components periodically.
Use Genuine HP Ink and Toner: Using original HP cartridges enhances print quality and prevents compatibility issues.
Keep Software Updated: Regularly updating printer drivers and firmware ensures smooth operation and improved security.
Optimize Printer Settings: Adjusting print quality and resolution settings can improve performance and save ink.
Handle Paper Properly: Use the correct paper type and store it in a dry place to prevent paper jams.
Final Thoughts
HP printers are among the most trusted and widely used printing devices, but occasional issues can arise. Fortunately, HP printers support provides comprehensive solutions to keep your printer running smoothly. Whether you need troubleshooting help, software updates, or repair services, HP's support system ensures a seamless experience. By following maintenance tips and utilizing available support resources, you can maximize your printer’s efficiency and longevity.
Re: ネズミのイラスト年賀状素材 子年 ( No.56 )
Stunning detail and creativity bring this mouse illustration to life—perfect for New Year's celebrations! Experienced tech expert resolving Canon printer E59 errors with troubleshooting, setup guidance, and efficient solutions for seamless printing performance. I just published a new blog post—check it out! Understanding and Fixing the Canon Printer E59 Error
Printers have become an essential part of our daily lives, whether for office work, school projects, or personal use. Among the many printer brands available, Canon stands out for its high-quality and reliable printing solutions. However, like any electronic device, Canon printers may encounter errors from time to time. One such issue is the Canon Printer E59 Error. This article will explain what the E59 error means, its possible causes, and the best methods to fix it effectively.
What is the Canon Printer E59 Error?
The Canon Printer E59 Error is a common issue that users may face while trying to print documents. This error typically appears when the printer's settings do not match the paper loaded in the tray. When this happens, the printer displays the E59 error code on its screen, preventing further printing until the issue is resolved.
Understanding the Canon Printer E59 Error is crucial for troubleshooting, as it helps users identify the root cause and apply the correct solution quickly.
Causes of the Canon Printer E59 Error
Several factors may trigger the E59 error in a Canon printer. Some of the most common causes include:
Incorrect Paper Settings – The most common reason behind the Canon Printer E59 Error is a mismatch between the selected paper settings on the printer and the actual paper loaded in the tray.
Wrong Print Mode – If the print mode does not align with the paper type selected, the printer may display the E59 error.
Software Glitch – A minor bug or temporary issue in the printer's software may also cause the E59 error.
Outdated Printer Drivers – If your printer drivers are outdated or not installed correctly, it may result in errors, including the Canon Printer E59 Error.
Hardware Issues – Though rare, a problem with the printer’s sensors or paper detection mechanism can also trigger the E59 error.
How to Fix the Canon Printer E59 Error
If you encounter the Canon Printer E59 Error, do not panic. The following solutions can help you fix the issue and resume printing efficiently.
1. Check and Adjust Paper Settings
Ensure that the paper size selected in the printer settings matches the paper in the tray.
If you are using A4 paper, confirm that the printer is set to A4 size in the settings.
Access the printer menu and navigate to Paper Settings to make the necessary adjustments.
2. Restart Your Printer
Turn off the Canon printer and unplug it from the power source.
Wait for a few minutes and plug it back in.
Restart the printer and try printing again to check if the E59 error is resolved.
3. Change the Print Mode
Open the printer settings on your computer.
Select the correct print mode according to the type of document you are printing.
Ensure that the selected mode matches the loaded paper.
4. Update or Reinstall Printer Drivers
Visit the official Canon website and download the latest drivers for your printer model.
Install the updated drivers and restart your computer.
Check if updating the drivers resolves the Canon Printer E59 Error.
5. Perform a Printer Reset
Press and hold the Stop button for about five seconds.
Wait for the printer to reset and restart automatically.
Try printing a test page to see if the error persists.
6. Check for Hardware Issues
Open the printer cover and inspect for any paper jams or debris inside.
Ensure that the paper tray and rollers are functioning properly.
If you suspect a hardware malfunction, consider contacting Canon support for assistance.
Preventing Future Occurrences of the E59 Error
To avoid encountering the Canon Printer E59 Error in the future, consider these preventive measures:
Always select the correct paper size and type before printing.
Regularly update your printer drivers to the latest version.
Keep your printer clean and free of dust to prevent sensor malfunctions.
Use high-quality paper that matches the printer’s specifications.
Follow the manufacturer’s guidelines for paper loading and handling.
Conclusion
The Canon Printer E59 Error can be frustrating, especially when you need to print important documents. However, by understanding its causes and applying the right solutions, you can easily fix the E59 error and continue printing without interruptions. Checking paper settings, updating drivers, and ensuring proper maintenance can help prevent this issue in the future. If none of the solutions work, seeking professional help from Canon support is always a good option.
Re: ネズミのイラスト年賀状素材 子年 ( No.55 )
必要な詳細をここで共有していただきありがとうございます。
Thanks for sharing the details here that we need. It is good for us to have the best solutions that are required when we need to do some repair job. We can learn more here to find the right services.
Re: ネズミのイラスト年賀状素材 子年 ( No.54 )
Re: ネズミのイラスト年賀状素材 子年 ( No.53 )
Well-crafted design, showcasing talent and cultural significance wonderfully! I am a health enthusiast, specializing in the best PCOD diet plan. PCOD Diet Plan: A Balanced Approach to Managing Symptoms
Polycystic Ovary Syndrome (PCOS), commonly known as PCOD (Polycystic Ovarian Disease), is a hormonal disorder that affects many women worldwide. It disrupts menstrual cycles, causes excessive weight gain, and increases the risk of diabetes and heart disease. A well-planned diet plays a crucial role in managing PCOD symptoms effectively.
Key Principles of a PCOD Diet
A PCOD diet should focus on stabilizing insulin levels, reducing inflammation, and supporting hormonal balance. The diet should be rich in fiber, lean proteins, healthy fats, and low-glycemic index (GI) carbohydrates while avoiding processed foods and excess sugars.
1. Foods to Include in a PCOD Diet
a) High-Fiber Foods
Fiber helps regulate blood sugar levels, improves digestion, and keeps you full for longer. Good sources include:
Leafy greens like spinach, kale, and lettuce
Cruciferous vegetables such as broccoli and cauliflower
Whole grains like quinoa, oats, and brown rice
Legumes including lentils, beans, and chickpeas
Fruits such as apples, pears, and berries
b) Lean Proteins
Protein supports muscle growth and prevents insulin spikes. Good protein sources include:
Eggs
Skinless chicken and turkey
Fish (salmon, mackerel, and tuna are rich in omega-3)
Plant-based proteins like tofu, tempeh, and paneer
Greek yogurt and cottage cheese
c) Healthy Fats
Healthy fats aid hormone production and help in reducing inflammation. Some great choices are:
Nuts like almonds, walnuts, and flaxseeds
Seeds including chia, sunflower, and pumpkin seeds
Avocados
Olive oil and coconut oil
Fatty fish such as salmon and sardines
d) Low-Glycemic Index (GI) Carbohydrates
Low-GI foods prevent sudden blood sugar spikes and help in weight management. Include:
Whole grains (millets, quinoa, and whole wheat)
Vegetables like carrots, cucumbers, and bell peppers
Sweet potatoes and yams
e) Anti-Inflammatory Foods
Chronic inflammation can worsen PCOD symptoms. Foods with anti-inflammatory properties include:
Turmeric (curcumin has strong anti-inflammatory effects)
Green tea
Berries like strawberries and blueberries
Dark chocolate (in moderation)
2. Foods to Avoid in a PCOD Diet
a) Refined Carbohydrates and Sugars
White bread, white rice, and pasta
Processed snacks like chips and biscuits
Sugary beverages such as soda and packaged fruit juices
Desserts like pastries, cakes, and candies
b) Dairy and High-Fat Foods
Some women with PCOD are sensitive to dairy, which can cause hormonal imbalances. Avoid:
Full-fat milk and cheese
Butter and cream
Excessive red meat and fried foods
c) Processed and Junk Foods
Fast food like burgers, pizzas, and fries
Instant noodles and ready-to-eat meals
Packaged chips and salty snacks
d) Excess Caffeine and Alcohol
Reduce coffee intake to avoid insulin resistance
Minimize alcohol consumption as it affects hormone levels
3. Sample PCOD Diet Plan
Morning (7:00 AM)
A glass of warm lemon water or fenugreek water
A handful of soaked almonds and walnuts
Breakfast (8:00 AM)
Oats porridge with flaxseeds and chia seeds
Scrambled eggs with multigrain toast
Green smoothie (spinach, banana, and almond milk)
Mid-Morning Snack (11:00 AM)
A bowl of Greek yogurt with berries
Handful of roasted chickpeas
Lunch (1:00 PM)
Brown rice with dal, a side of mixed veggies, and salad
Quinoa and paneer stir-fry with curd
Grilled chicken with sautéed greens
Evening Snack (4:00 PM)
Handful of nuts and herbal tea
Roasted makhana (fox nuts)
Dinner (7:30 PM - 8:00 PM)
Grilled fish or tofu with steamed vegetables
Moong dal chilla with mint chutney
Vegetable soup with whole wheat crackers
Bedtime (10:00 PM)
Warm turmeric milk or chamomile tea
4. Lifestyle Tips for Managing PCOD
Exercise Regularly: A combination of strength training, yoga, and cardio helps maintain weight and regulate hormones.
Manage Stress: High stress can worsen symptoms. Try meditation, deep breathing, and relaxation techniques.
Stay Hydrated: Drinking at least 2-3 liters of water daily is essential for metabolic health.
Adequate Sleep: Aim for 7-8 hours of quality sleep every night to support hormonal balance.
Conclusion
A well-structured diet is essential in managing PCOD symptoms effectively. By making mindful food choices, avoiding processed foods, and adopting a healthy lifestyle, women with PCOD can achieve better hormonal balance, improve fertility, and enhance overall well-being. Consistency and discipline in diet and lifestyle modifications play a crucial role in long-term health improvement.成
Re: ネズミのイラスト年賀状素材 子年 ( No.52 )
Creative and expressive, this artwork adds warmth to festive greetings. I am a specialist in panel clean room solutions for industries. A panel clean room is a controlled environment designed to maintain a low level of airborne contaminants, such as dust, microbes, and chemical vapors. These clean rooms are constructed using PUF (Polyurethane Foam) panels, EPS (Expanded Polystyrene) panels, or metallic insulated panels to ensure proper insulation, temperature control, and contamination resistance. They are widely used in industries like pharmaceuticals, biotechnology, electronics, food processing, and healthcare, where maintaining sterility and precision is critical.
Understanding Panel Clean Rooms
A panel clean room consists of prefabricated panels that interlock to form walls, ceilings, and partitions. These panels are designed to be airtight and easy to clean, reducing the risk of contamination. The choice of materials plays a significant role in ensuring that the clean room meets regulatory standards, such as ISO 14644-1 and GMP (Good Manufacturing Practices).
Key Features of Panel Clean Rooms
Modular Construction – Panel-based clean rooms are modular, making them easy to assemble, expand, or modify as per the industry’s needs.
Contamination Control – These rooms use high-efficiency particulate air (HEPA) and ultra-low penetration air (ULPA) filters to maintain particle-free environments.
Temperature & Humidity Control – Advanced HVAC (Heating, Ventilation, and Air Conditioning) systems regulate temperature and humidity to maintain controlled conditions.
Electrostatic Discharge (ESD) Protection – Essential for electronics and semiconductor industries, ESD-protected clean rooms prevent static electricity damage.
Easy Maintenance – The smooth, non-porous surface of the panels allows easy cleaning with disinfectants and minimizes bacterial growth.
Materials Used in Panel Clean Rooms
PUF Panels: Known for their thermal insulation and durability, these panels are fire-resistant and energy-efficient.
EPS Panels: Lightweight and cost-effective, but they may have lower thermal insulation properties compared to PUF panels.
Metallic Panels: Stainless steel or aluminum panels provide extra strength and resistance to chemical exposure.
Applications of Panel Clean Rooms
1. Pharmaceuticals & Biotechnology
Used for drug formulation, packaging, and research labs.
Prevents contamination during vaccine production.
Ensures compliance with FDA and GMP regulations.
2. Electronics & Semiconductor Manufacturing
Essential for microchip and circuit board assembly.
Protects sensitive electronic components from dust and static electricity.
Maintains strict environmental controls to prevent defects.
3. Food & Beverage Industry
Required in the processing and packaging of sterile foods.
Ensures hygiene standards and extends product shelf life.
Prevents contamination from airborne microbes and pollutants.
4. Healthcare & Hospitals
Used in surgical suites, ICU rooms, and diagnostic labs.
Reduces the risk of infections in critical care areas.
Supports medical device sterilization and pharmaceutical storage.
Advantages of Panel Clean Rooms
Quick Installation – Prefabricated panels enable fast and hassle-free setup.
Scalability – Easily expandable to accommodate changing industry requirements.
Energy Efficiency – Insulated panels reduce heat loss, lowering energy costs.
Cost-Effective – More affordable than traditional brick-and-mortar clean rooms.
Regulatory Compliance – Meets strict industry standards for hygiene and contamination control.
Conclusion
A panel clean room is an efficient and reliable solution for industries that require a controlled and contamination-free environment. The modular construction, advanced filtration systems, and high-quality insulation make them ideal for applications ranging from pharmaceuticals to electronics manufacturing. By choosing the right type of panel, industries can enhance operational efficiency, ensure product safety, and comply with international regulatory standards.
Re: ネズミのイラスト年賀状素材 子年 ( No.51 )
Charming and artistic, capturing the essence of traditional New Year themes. I am a tech enthusiast troubleshooting why HP Envy 5530 does not print. If your HP Envy 5530 printer is not printing, it can be due to multiple reasons, including hardware issues, connection problems, driver errors, or ink-related concerns. Below is a detailed guide to troubleshooting and resolving this issue.
1. Check Printer Connections
Start by ensuring that your printer is properly connected:
If using a USB connection, ensure the cable is securely plugged into both the printer and the computer.
If using a wireless connection, confirm that your printer is connected to the correct Wi-Fi network. You can check this by printing a Wireless Network Test Report from the printer’s settings.
2. Check for Error Messages
Look at your printer’s display panel for any error messages or blinking lights. If there’s a specific error code, refer to HP’s support website to find its meaning and the appropriate fix.
3. Set HP Envy 5530 as the Default Printer
Sometimes, the print job may be sent to a different printer, preventing the HP Envy 5530 from printing.
On Windows:
Open Control Panel > Devices and Printers.
Right-click on HP Envy 5530 and select Set as default printer.
On Mac:
Go to System Preferences > Printers & Scanners.
Select HP Envy 5530 as the default printer.
4. Check the Print Queue
A stuck print job can prevent new documents from printing.
On Windows:
Open Control Panel > Devices and Printers.
Right-click on the printer and choose See what's printing.
If there are pending jobs, click Cancel all documents.
On Mac:
Open Printers & Scanners.
Select HP Envy 5530 and check for any stuck print jobs.
5. Restart the Printer and Computer
A simple restart can sometimes resolve printing issues.
Turn off the printer, unplug the power cord, and wait for a minute.
Restart your computer.
Turn the printer back on and try printing again.
6. Check Ink Levels and Replace Empty Cartridges
Low or empty ink cartridges can prevent printing. Check ink levels on the printer’s display or from HP’s Printer Assistant software on your computer. If the ink is low:
Open the printer cover.
Remove the empty ink cartridges.
Insert new HP 61 or HP 61XL ink cartridges (black and tri-color) as required.
Align the cartridges using the printer’s menu.
7. Run HP Print and Scan Doctor
HP provides a free tool called HP Print and Scan Doctor, which can diagnose and fix common printing problems.
Download the tool from the HP website.
Run the program and follow the on-screen instructions to troubleshoot.
8. Update or Reinstall Printer Drivers
Outdated or corrupted drivers can cause printing issues.
On Windows:
Open Device Manager.
Expand Printers.
Right-click on HP Envy 5530 and select Update driver.
If updating doesn’t help, uninstall the driver and reinstall it from HP’s website.
On Mac:
Go to System Preferences > Printers & Scanners.
Remove the printer and re-add it.
9. Check for Paper Jams
A paper jam can prevent the printer from functioning.
Open the rear access panel and remove any stuck paper.
Check inside the ink cartridge area for small pieces of paper.
Reload fresh paper in the tray.
10. Reset the Printer
If nothing works, a factory reset may help.
On the printer’s touchscreen, go to Setup > Printer Maintenance > Restore Defaults.
Confirm the reset and set up the printer again.
Conclusion
By following these steps, you should be able to resolve most issues preventing your HP Envy 5530 from printing. If the problem persists, contacting HP Support for further assistance may be necessary.
Page: | 最初 | 1 | 2 | 3 | 4 | 5 ... | 最後 |